
 Pressure Cooker
◦
Pressure Cooker Gooey Caramel – step by step instructions for making your first batch of pressure cooker caramel!
What could be better at the beginning of Fall than making your first batch of caramel? It’s my guess that not many of you have ever made your own homemade caramel, but if you have, it’s probably included a saucepan on the stove, a candy thermometer that only works half of the time, and lots of butter, cream, ad sugar.
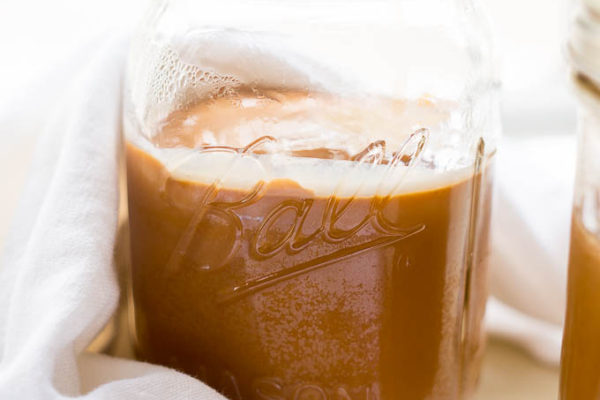
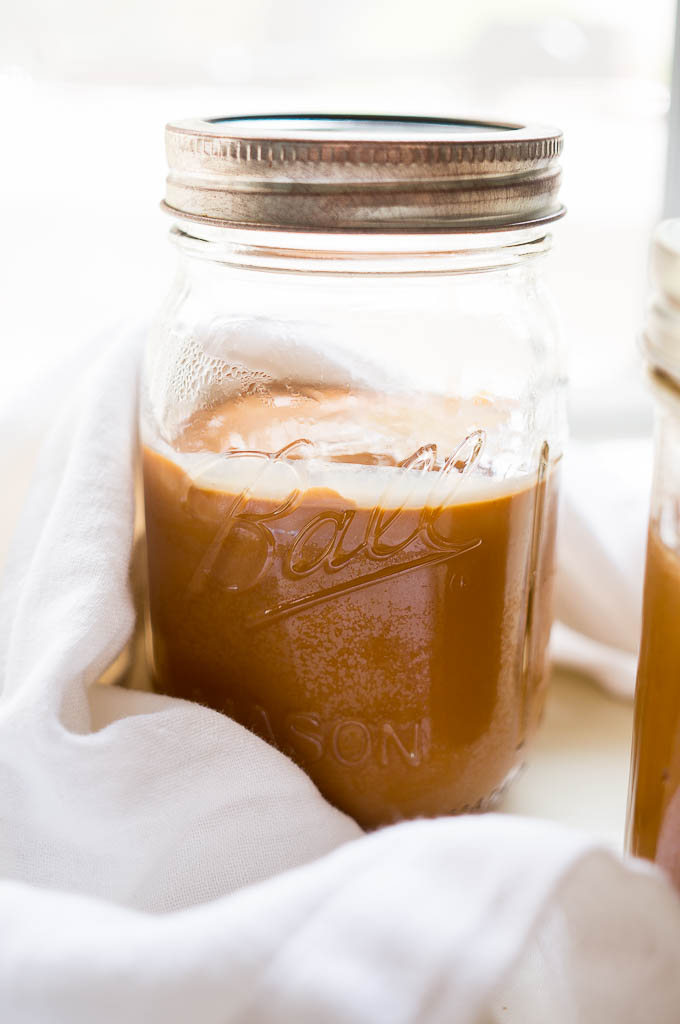
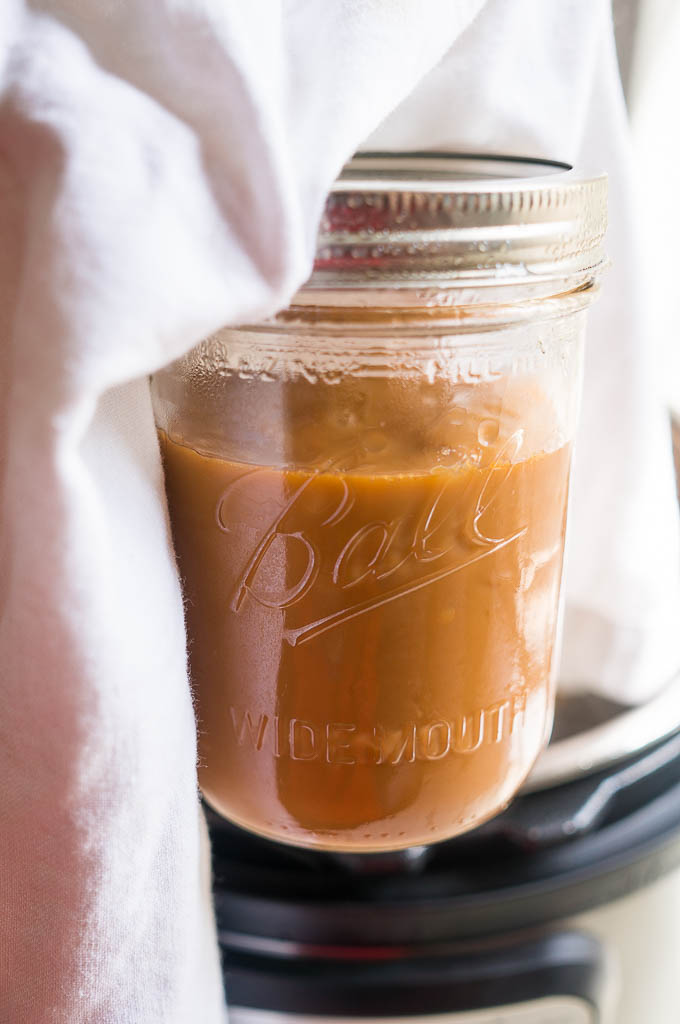
What if I told you that you could use a can of sweetened condensed milk and a mason jar and have the yummiest, ooey gooey caramel in the whole wide world?? That’s it!! It couldn’t be easier, or cheaper for that matter. I’ve seen sweetened condensed milk for anywhere from $0.79 to $1.39, which even at the high end of things is less than half the price of a jar of store bought caramel!
This caramel is the perfect kind for apple dipping, heating and drizzling over anything your little heart desires, or just eating by the spoonful. I’m partial to that final method…
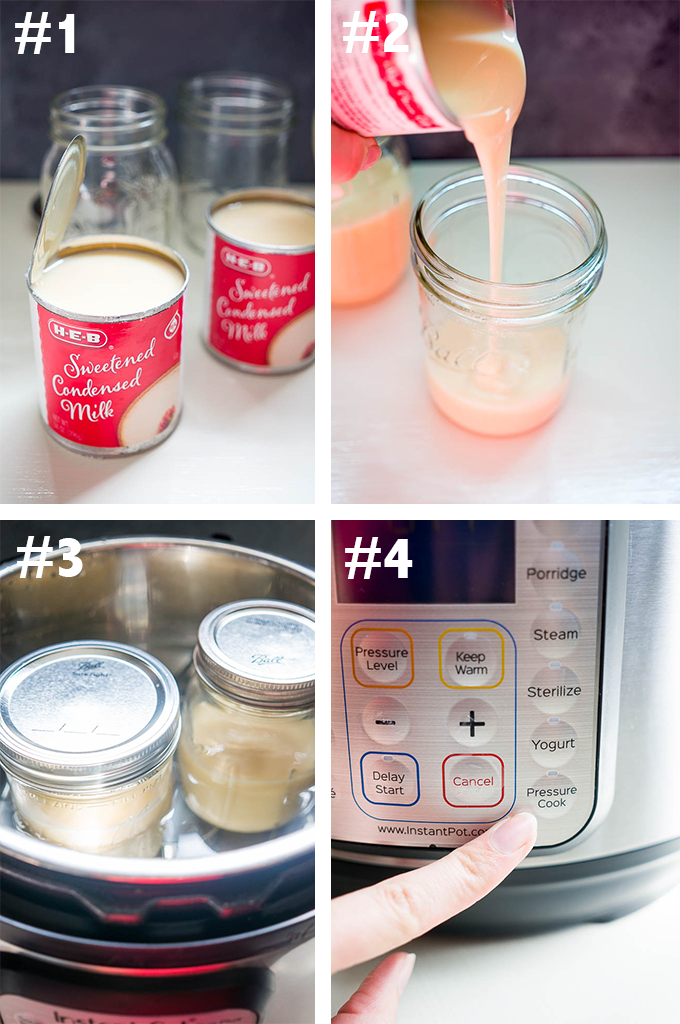
You’ll notice below that I’m trying a new style of recipe post for my pressure cooker recipes. I know many of you are fairly new to your pressure cooker, so I want to make things as easy for you to figure out as possible. Read through the actual recipe at the bottom of the page for specific directions, ingredients, and measurements, then follow along with the collage photos, step by step, to make sure you’re on the right track!
I can’t wait to hear what you think of your first batch of caramel!
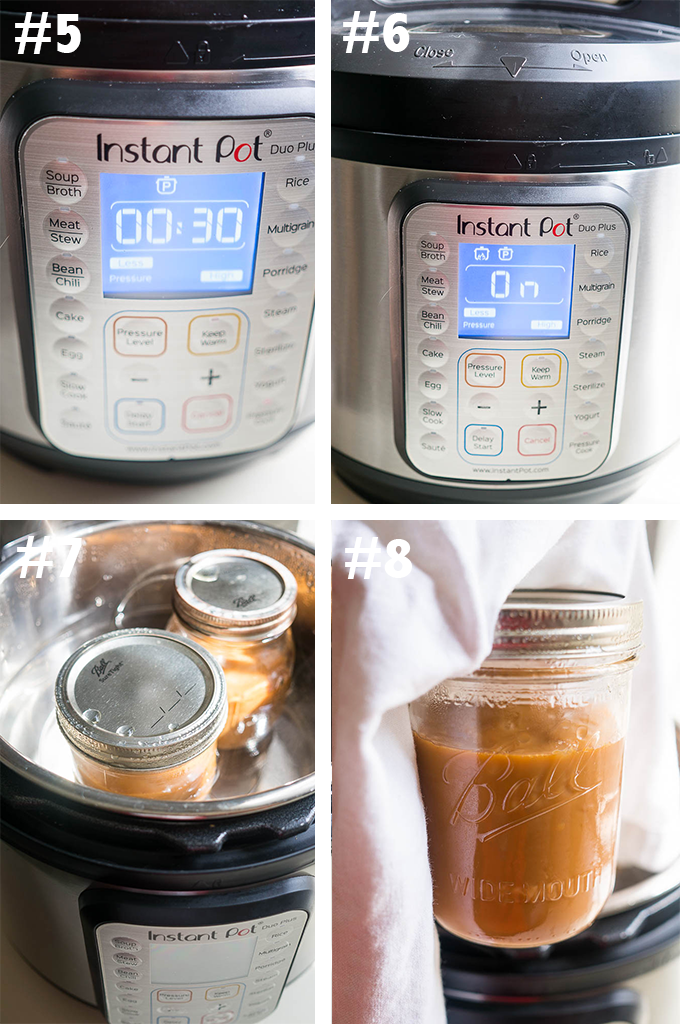
Coming up to pressure: 20 minutes
Cook time: 30 minutes
Release Time: 15 minutes
Pressure Cooker Sticky Pumpkin Caramel Cheesecake
Comments are closed.
What if u want to do just 1 jar? Do u change the time?
Hi Lyz,
Nope no change, follow all the same instructions! Can’t wait to hear how you like it!
I only have half pint jars. Can I use 4 of those?
Hi Barb! You can definitely use the half pints, just be sure to leave about an inch of space at the top when you’re pouring your sweetened condensed milk in.
Looks awesome! I have one question…is there a reason for transferring the condensed milk to the glass jars? I’ve seen this done on the stove top without the extra step so I’m curious.
Hi Molly, you’re right, I’ve seen a few recipes where they do it straight in the can, but I don’t know the mechanics behind it. I do know that it’s a pain to remove the adhesive if you cook it right in a can, so that process is eliminated when you use a mason jar.
I guess you have to leave a little space in the jar because the condensed milk boils but I wanted to make in those small 6oz jars, have you tried those? I usually do this in the can and I’m a bit worried the glasses will break.
Hi Tatiana, I haven’t tried making it in the smaller jars, but you should be fine as long as you leave a little room at the top – about an inch!